Members
Manage who accesses the workspace
Members are the people who are part of a workspace in ENSPACE. Each member has a license type that defines their base access level and a role that refines their granular permissions.
Members can also be organized into Member Groups, making it easier to configure access in bulk. A member can belong to multiple groups simultaneously. Groups do not replace roles — roles directly control permissions, while groups are used for organization and bulk configuration.
To access the members screen, go to Settings > Member Management in the side menu.
License types
When inviting a member to the workspace, you define their license type. The type determines the base access level — roles and permissions operate within the limits defined by the license.
| Owner | Full | Standard | Viewer | |
|---|---|---|---|---|
| Items | Unrestricted | All | Based on permissions | Read-only |
| Tasks | Unrestricted | All | Based on permissions | Read-only |
| Workspace settings | Full | Yes | No | No |
| Manage members | Yes | Yes | No | No |
- Owner — unrestricted access to everything in the workspace. It is the only type whose permissions cannot be reduced by any role. Each workspace has at least one Owner (the creator). To add co-owners or transfer ownership, contact ENSPACE support.
- Full — broad access, including workspace settings. With all role permissions enabled, it is equivalent to Owner — the difference is that Full users can have their permissions restricted by roles.
- Standard — operational access for day-to-day work (data, tasks, forms). No access to workspace settings and cannot manage members. With all permissions enabled, it is equivalent to Full, except for access to settings.
- Viewer — 100% read-only access. Can view data and tasks according to role permissions but cannot create, edit, or delete anything. Permissions can be further restricted (e.g., view only specific categories).
The license type may impact the cost of the subscribed plan. See the available plans for more details.
How to invite a member
Access Member Management
In the side menu, go to Settings > Member Management. The Members tab displays a list of all workspace members with their information: user, license type, status, and invitation status.
Click Invite
In the top-right corner, click the Invite button.
Fill in invitation details
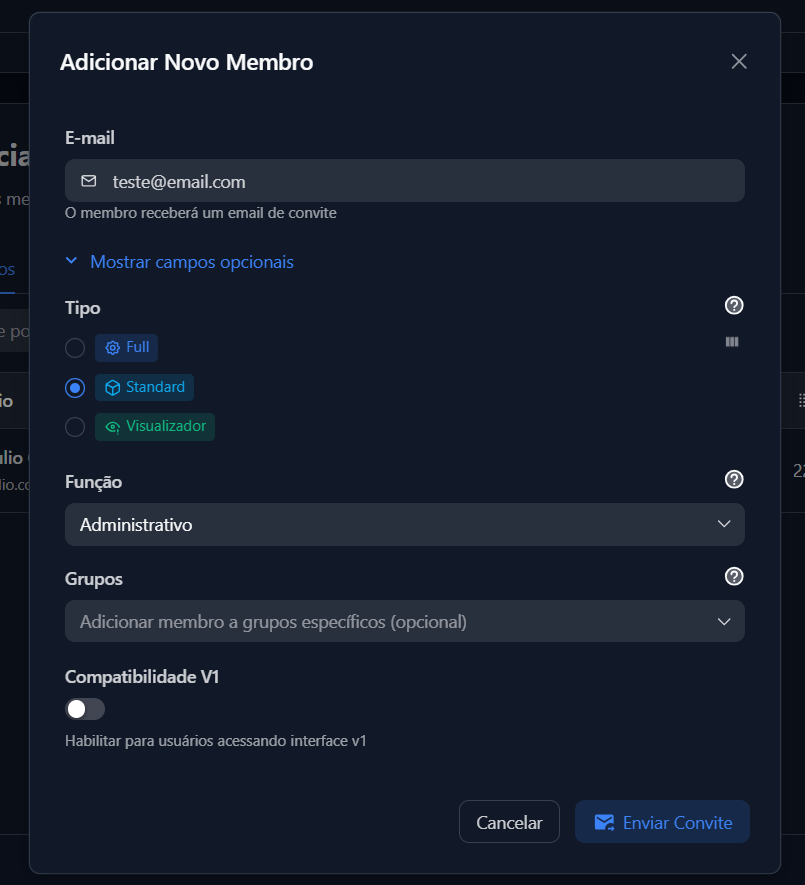
Enter the person’s email and select the license type.
Configure additional options (optional)
- Role — assign a role to define the member’s granular permissions.
- Groups — add the member to one or more Member Groups.
- Seal — assign a seal to the member for use in official documents generated by flows. This option is only available if "Enable custom document stamp" is enabled in Settings > System. For more information, see Document Seal.
Confirm and send
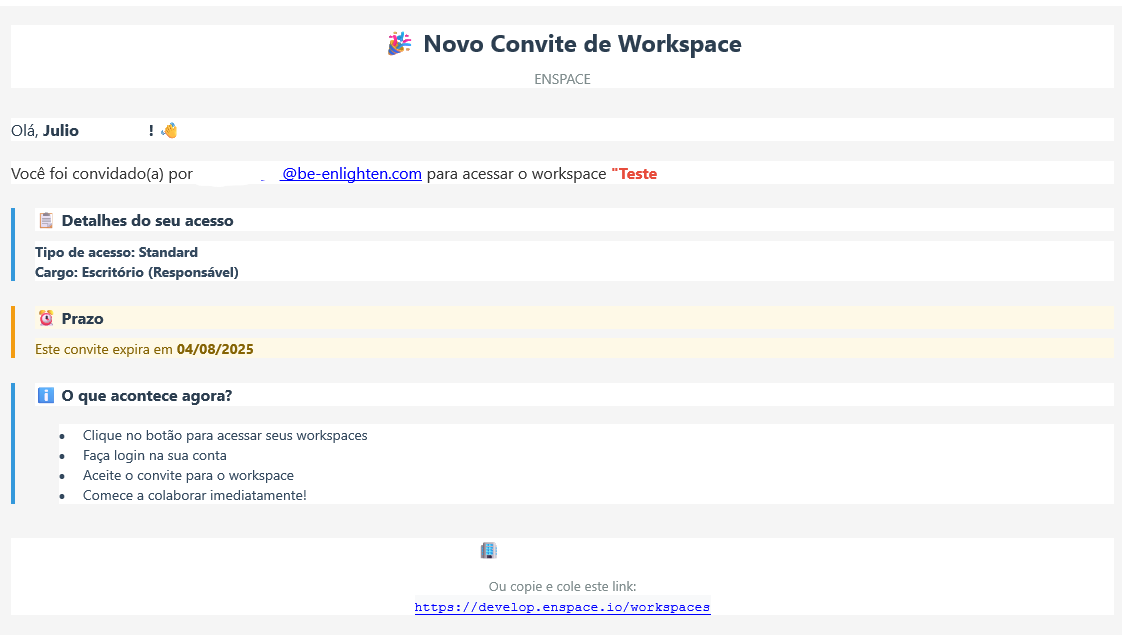
The member will receive an email invitation to access the workspace.
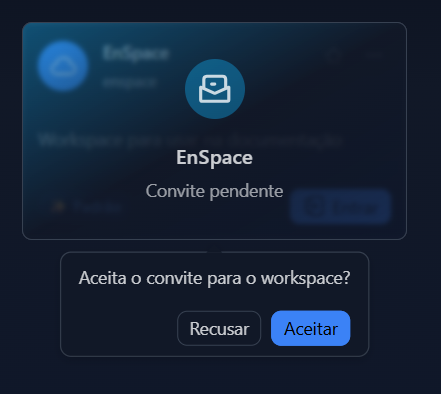
After clicking the email link, the invitation will appear on the ENSPACE home screen with options to accept or decline.
Invitations expire after 15 days. After this period, a new invitation must be sent. If the invitee declines, the invitation will appear in the Invitation Status column as "Declined" and you can remove the member from the list. For more details about the invitation flow, see the Registration page.
Bulk invite
To invite multiple members at once, click the Bulk Invite button in the top-right corner of the Member Management screen. The system will open a wizard with the following steps:
- Upload — upload an Excel (.xlsx, .xls) or CSV (.csv) file with member data. If you don’t have a file, download the template available on the screen.
- Mapping — map your file columns to ENSPACE fields.
- Preview — review imported data before processing.
- Analysis — the system checks for inconsistencies or errors.
- Processing — invitations are sent.
- Results — view the import result.
Member management table
The members table displays the following columns:
- Actions — available options for the member.
- User — member name and email.
- Type — license type (Owner, Full, Standard, or Viewer).
- Status — member status in the workspace: Active, Pending, Inactive, or Blocked.
- Invitation Status — invitation state: Completed (accepted), Pending (waiting response), or Declined.
At the top of the table, a search bar allows you to find members by email. The Export and Columns buttons allow data export and column customization.
The export generates a file with the following member information: ID, email, creation date, license type, role, and status.
Change license type or role
In Member Management, click a member to open the Member Details modal. There you can:
- Change the license type (Full, Standard, Viewer). Changes take effect immediately — if a Full member is changed to Standard, they immediately lose access to settings.
- Change member status:
- Active — normal access to the workspace.
- Inactive — member no longer actively uses the workspace. They remain linked but marked as inactive.
- Blocked — member whose access has been restricted by ENSPACE administration.
- Pending — member who has not yet accepted the invitation or set up credentials.
- Assign or change the role.
- Configure temporary absence.
- Configure the member’s seal.
Removing a member is different from deleting a user. When removed, the member loses their workspace association but still exists as a user in ENSPACE and can access other workspaces normally. All data and records they created remain intact in the workspace.
Remove a member
In Member Management, click a member to open the Member Details modal and click Remove in the bottom-left corner. Alternatively, click the Actions button next to the member in the table and select Delete.
For permanent user blocking, contact support at suporte@enspace.io.
Temporary absence
If a member will be temporarily unavailable (vacation, leave, travel), you can register their absence in the workspace. Temporary absence does not suspend access — the member can still use the workspace normally. What changes is that tasks assigned to them can be shared with other people during the configured period.
This feature is configured in the Member Details modal via the Temporary Absence button.
For more details, see Temporary Absences.