AI Router
AI Router
The AI Router node uses an artificial intelligence model to analyze incoming content and automatically decide which path the flow should follow. You define the possible routes and their criteria — the AI evaluates the content and directs the execution along the most appropriate route.
It is ideal for flows that require dynamic decisions based on context — for example, forwarding a support ticket to the correct department or directing a lead to the appropriate funnel.
Adding the node to the flow
To use the AI Router, open the node sidebar in Spaceflow and expand the A.I. section. Drag the AI Router node onto the canvas and connect its input to the desired previous node.

When you connect the node to a previous node, you gain access to that node's variables to use in the prompt.
Configuring the node
Double-click the node to open its settings. The fields are organized as follows:
Node Name
Node Name — the display name of this node in the flow. You can rename it for easier identification.
Model settings
Model — the language model used to process this node. Click the field to expand the options and select the desired model.

Response creativity — controls the variation of generated responses. The value ranges from 0 to 2. For routing, low values (such as 0.2) are recommended, as they produce more consistent and predictable decisions. The default value is 0.2.

Tip: for routing nodes, keeping creativity low ensures the AI makes more stable decisions. Increase the value only if you need flexibility in how the content is interpreted.
Prompt
Prompt — describe the general routing criteria. The AI will use this instruction along with the routes defined below to decide the path. This field is required.

As with other AI nodes, you can combine fixed text with dynamic variables from previous nodes. To insert a variable, open the Input sidebar (on the left side of the node) and drag the desired variable into the field.
Routes
Routes define the possible paths the flow can follow. For each route, the AI evaluates whether the incoming content matches the described criteria.
To add a route, click Add. Each route has two fields:
Route name — a short, unique name to identify the route. It will be displayed as an output on the canvas.
Description — describe when the content should follow this route. The more specific the description, the more accurate the AI's decision will be.
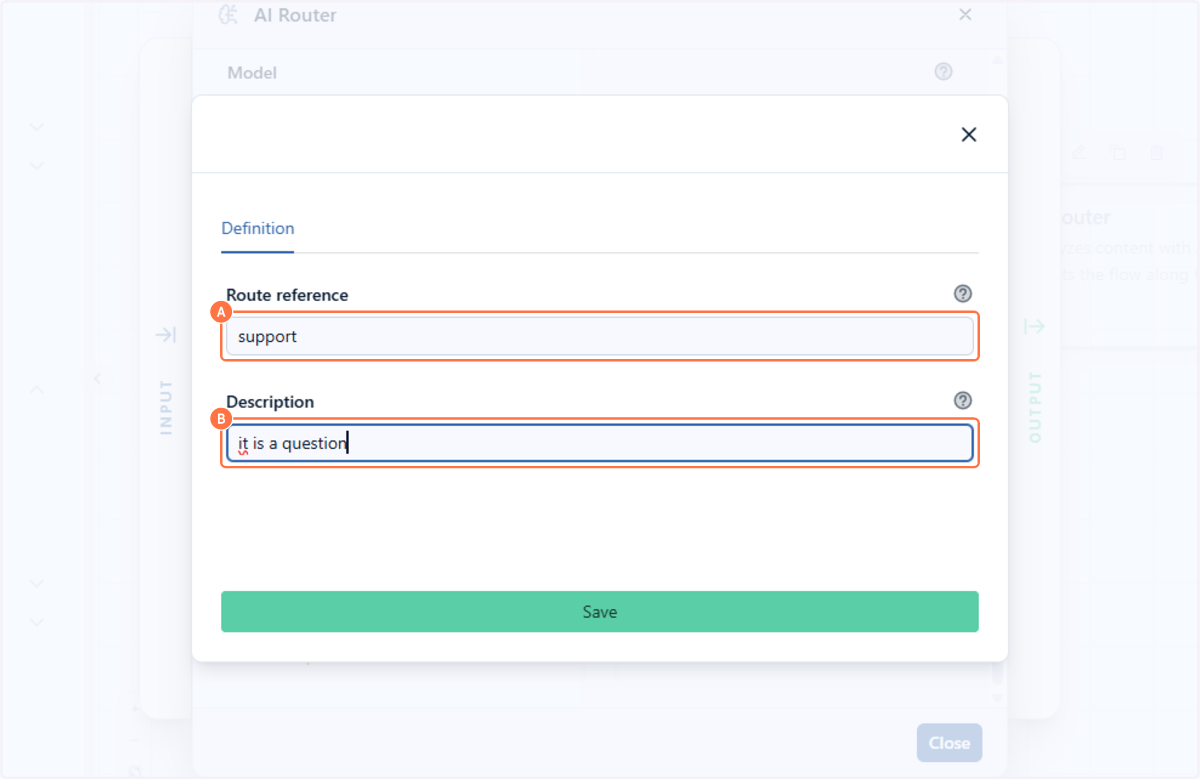
You can add as many routes as you need. After configuring all of them, click Save and close.

Example: in a customer service flow, you can create the routes "Finance," "Technical Support," and "Sales," each with a description of the type of request that fits it. The AI will read the ticket content and direct the flow to the appropriate department.
Node outputs
After saving the settings, the node will display on the canvas one output for each route you configured, plus an extra output called Fallback.

The Fallback is a route automatically created by the system. It is triggered when the AI cannot match the content to any of the defined routes. Connect the Fallback to a node that handles these cases — for example, a notification for manual review.
Each route produces three variables that can be used in subsequent nodes:
response — the name of the route selected by the AI.
accuracy — the AI's confidence level in the decision made.
reason — the AI's justification for choosing that route.
Tip: use the accuracy variable in subsequent nodes to create conditional logic — for example, forwarding to human review when accuracy falls below a certain threshold.