Modules
Comparisons
All about the Comparisons module.
updated
Comparison Module between Responsible and Approver
ENSPACE has a comparison module that ensures security, traceability, and compliance in the sending and return of information between responsible users and approvers.
How the Comparison Process Works
- Starting the Comparison
The approving department initiates the process by registering it in ENSPACE through a customizable form. - Sending to the Responsible Users
Once the request is created, it is automatically forwarded to the responsible users for review. After comparing and making any adjustments, the information is sent to the approver for analysis if there are discrepancies in the adjusted items. - Approver's Analysis and Response
The approver reviews the received information and may approve or reject it. If rejected, the process returns to the responsible user within the system, who can then approve or reject the approver’s version. - Returning to the Responsible Users
The process remains in cycle until one of the parties approves the version sent by the other. - Closing the Comparison
After final approval by either the responsible user or the approver, the process is closed and archived, with access control and audit capability.
Security and Control
- The entire flow is protected by access control based on roles and permissions;
- Tasks have clear statuses to facilitate tracking.
How to Configure
- GENERAL
- Access your workspace dedicated to comparisons and create your process category.
- In settings, under "Workspace Config.", enable the "Comparisons" module.
- Still in the settings:
- In "Member Groups", create a group for each responsible user. E.g.: Responsible São Paulo, Responsible Minas Gerais, etc.
- In "Roles and Permissions", create two roles: one for approver and another for responsible, both with all permissions enabled.
⚠️ Remember two important things: always assign members to the correct roles and permissions; and any member under a responsible role must have a Standard license.
- FIELDS
- Inside the process category, create all relevant fields for your process flow, including the responsible field.
⚠️ The responsible field is MANDATORY. It must be a selection field with the origin set to "Member Groups".
- FORMS
- You will need 3 forms:
- Registration: used to create new processes.
- Responsible View: contains the information that should be visible to the responsible user. Typically similar to the registration form, without the responsible field.
- Data to Be Compared: the most important form. Include only the data to be compared (can be modified by the responsible user).
- REPORTS
- Create a new report to be used as the comparison report. Include all relevant data, including the reference/ticket column.
⚠️ Remember to remove "data >" from the beginning of column names to avoid conflicts and ensure autonomy.
- THE COMPARISON
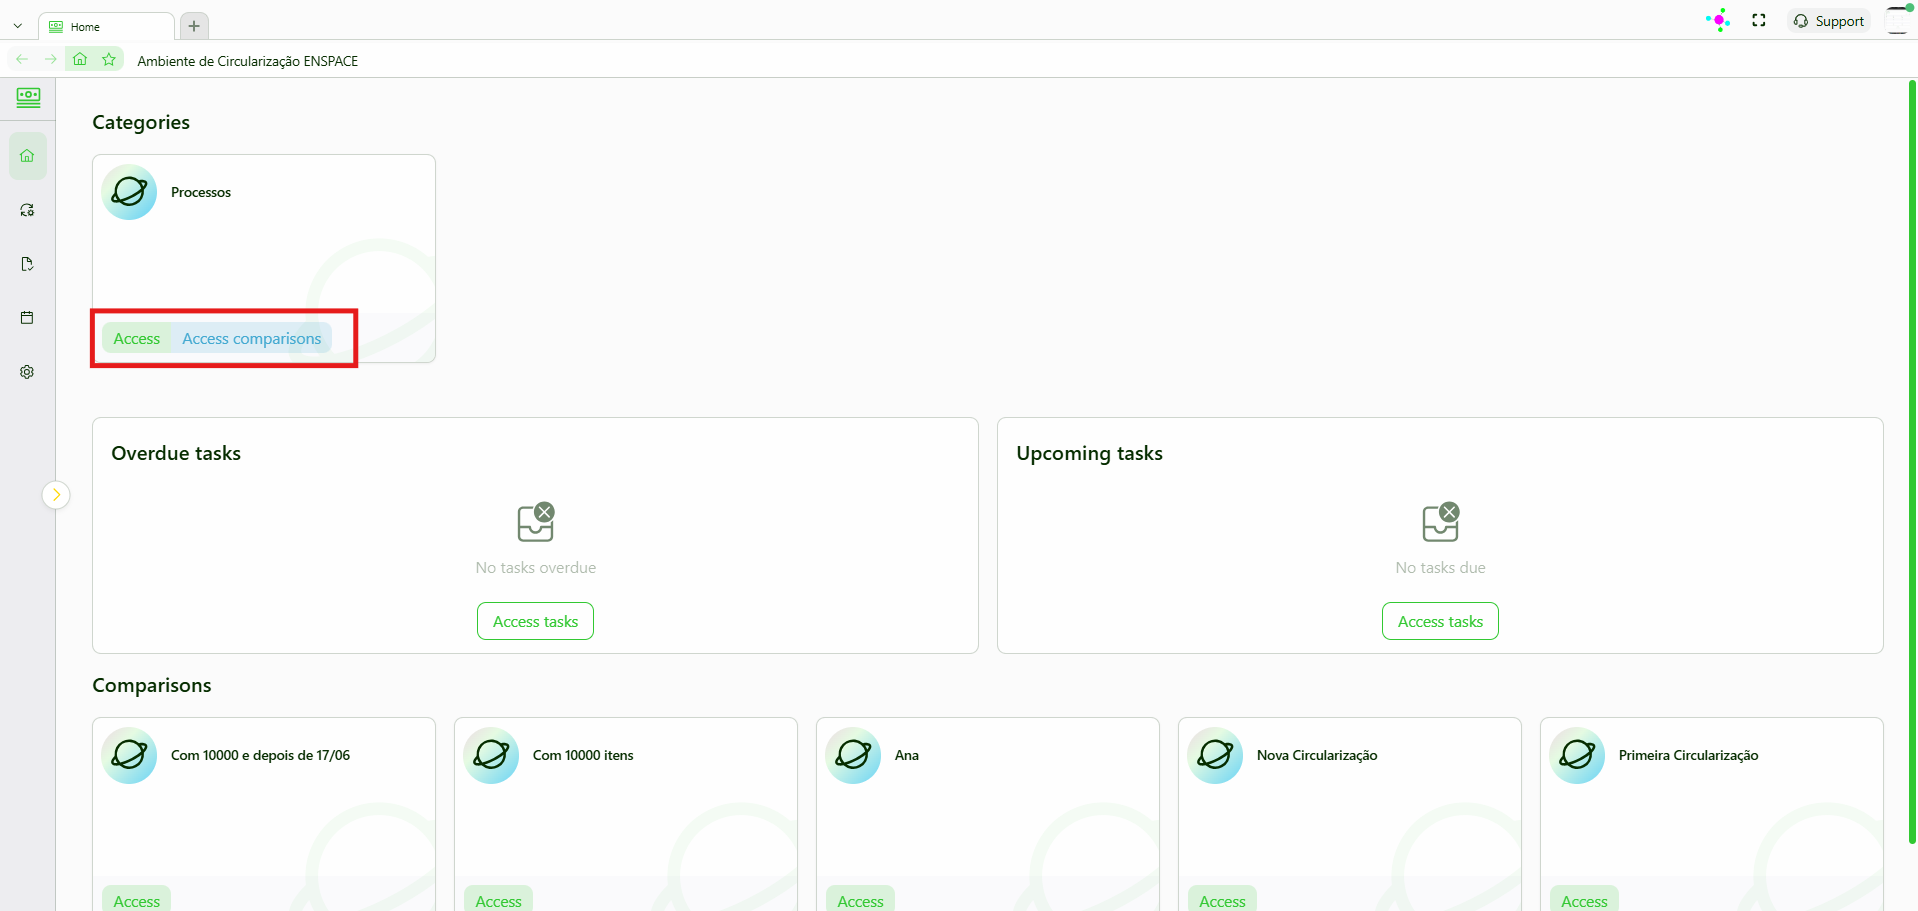
- Go back to your workspace home. Notice the new option "Access Comparisons". This button appears only for the approver when the comparisons module is enabled:
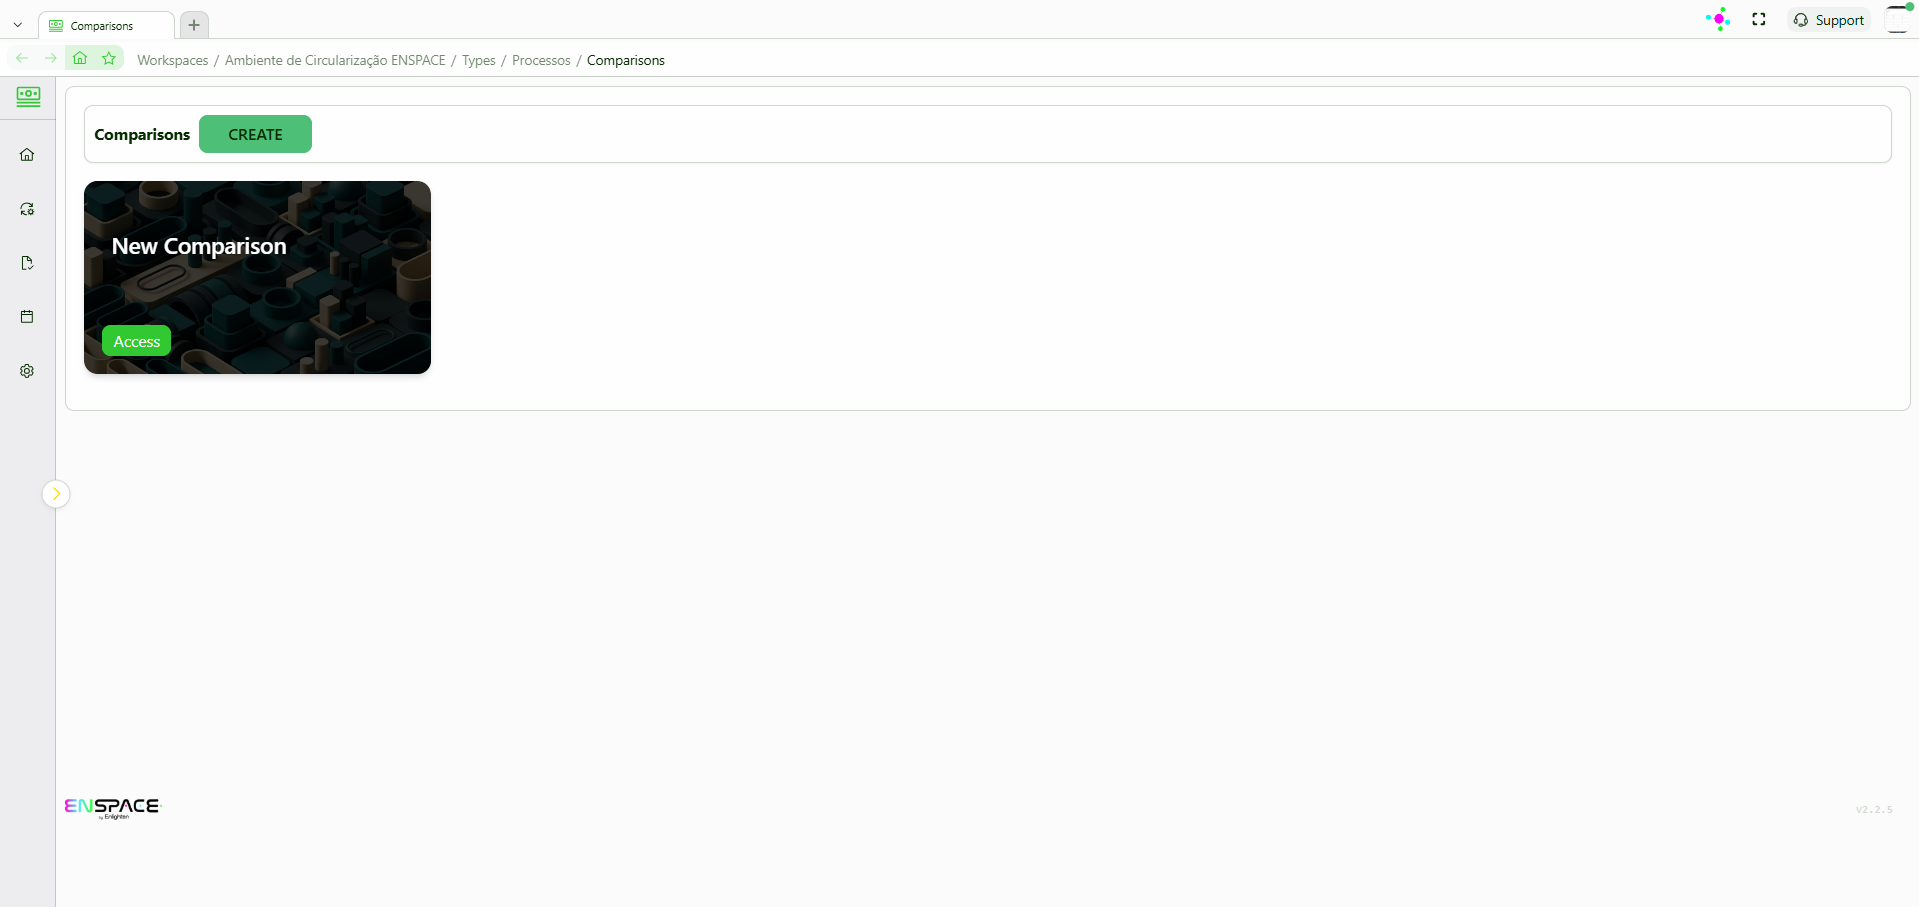
- Click on "Access Comparisons". If a comparison is already configured, it will appear here. If not, click "Create":
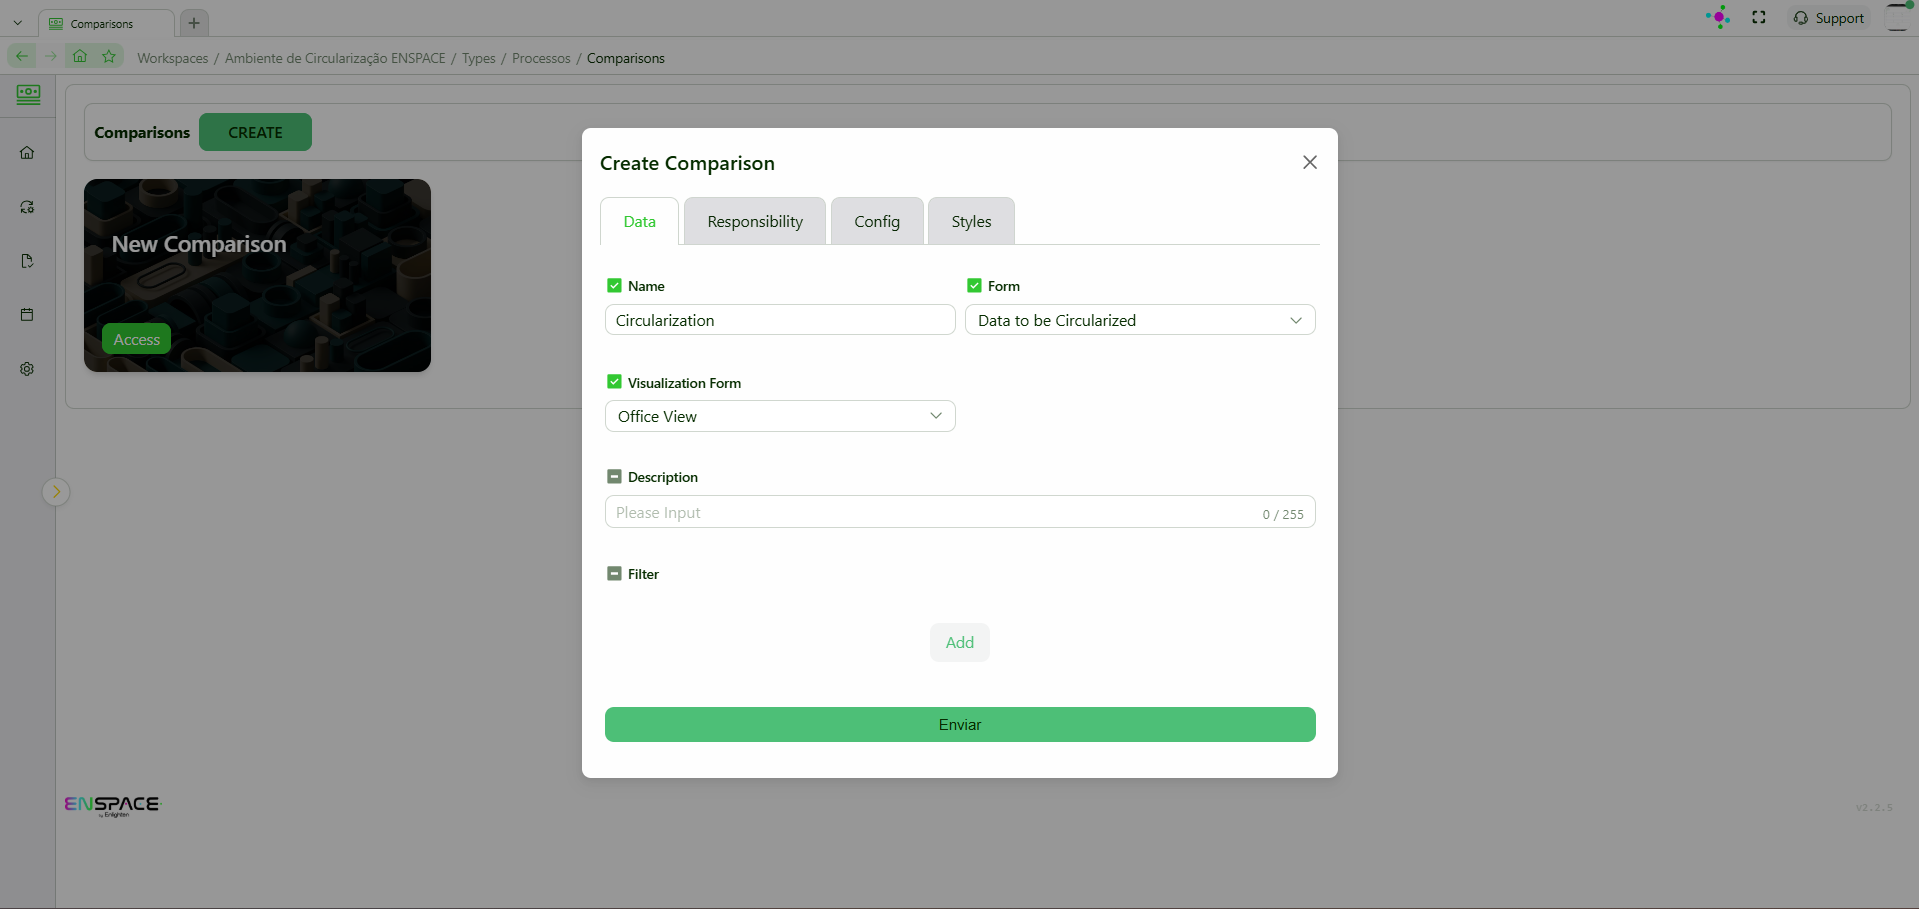
- Upon clicking create, a modal will appear with the following fields under the "Data" tab:
- Name: comparison name
- Form: select the Data to Be Compared (editable) form
- Responsible view form: the responsible user’s view form
⚠️ Still on this tab, optional fields like description or filters can also be added.
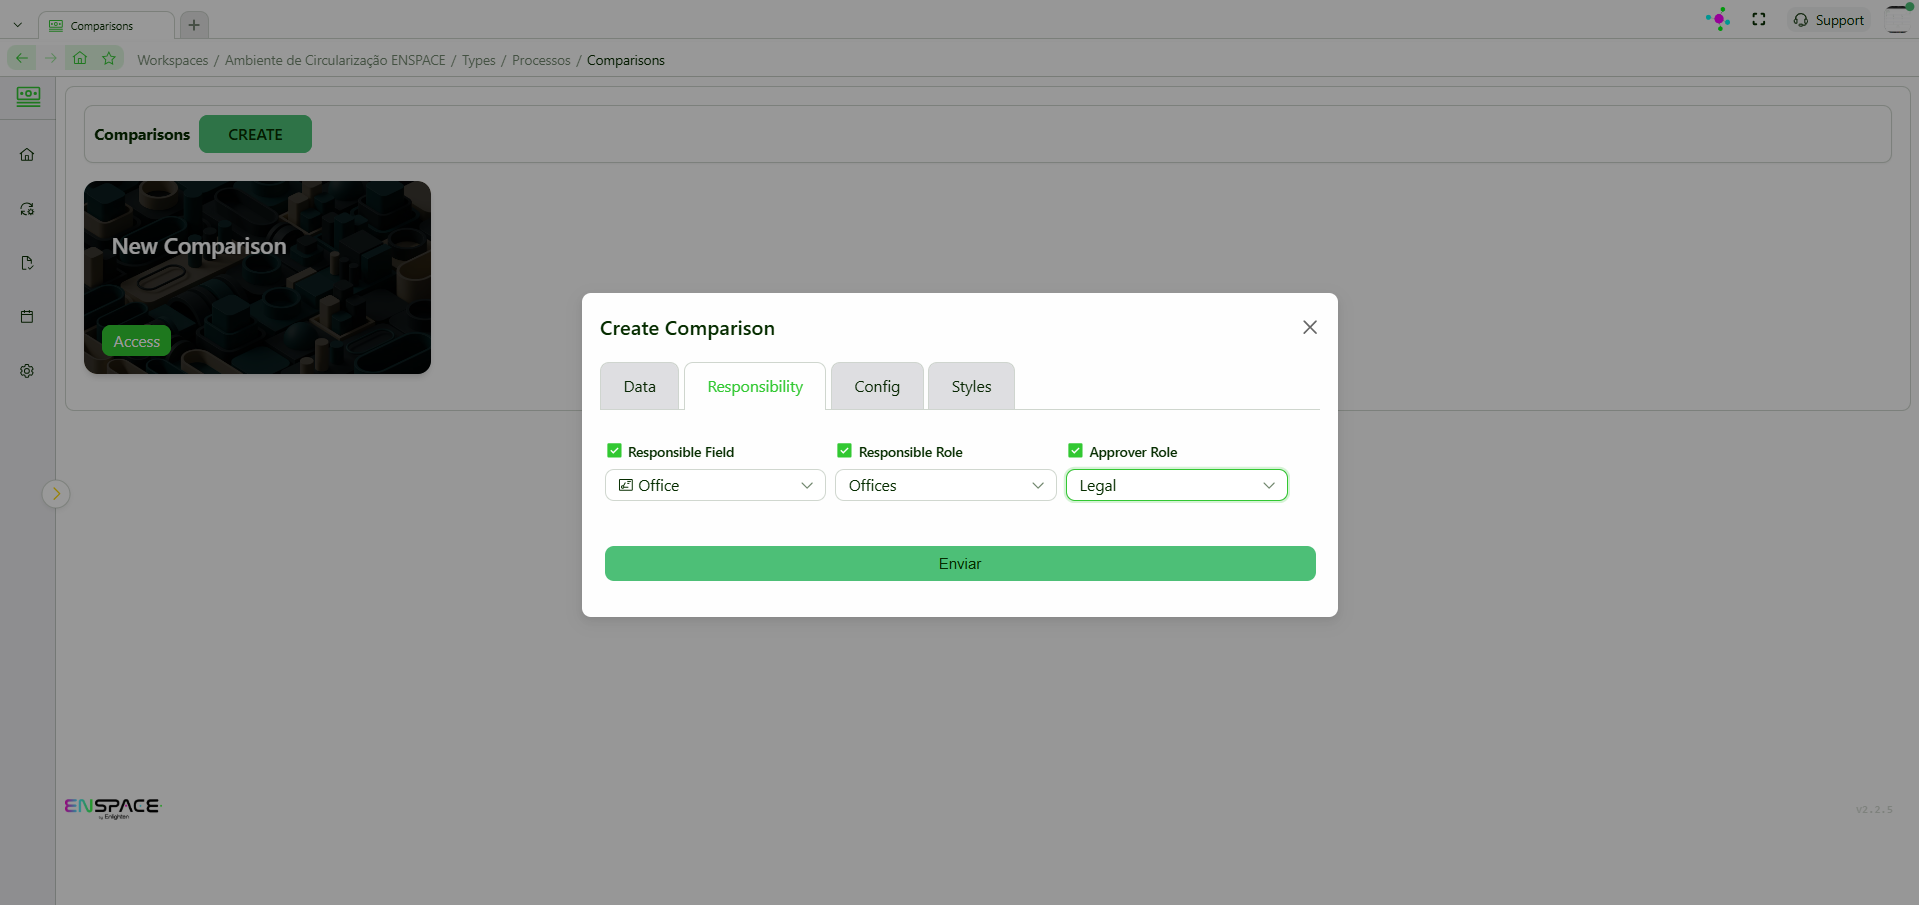
- In the "Responsibility" tab, define:
- Responsible field: the responsible field
- Responsible role: the "responsible" role
- Approver role: the "approver" role
- In the "Configuration" tab, define:
- Default report: select the default report you created
Optional:- Show Results in Report: add more data to the final report. Enabling this requires naming the following additional columns:
"Result Name for 'Corrected by Responsible'"
"Result Name for 'Corrected by Approver'"
"Result Name for 'Matching Data'"
"Result Name for 'Mismatched Data'"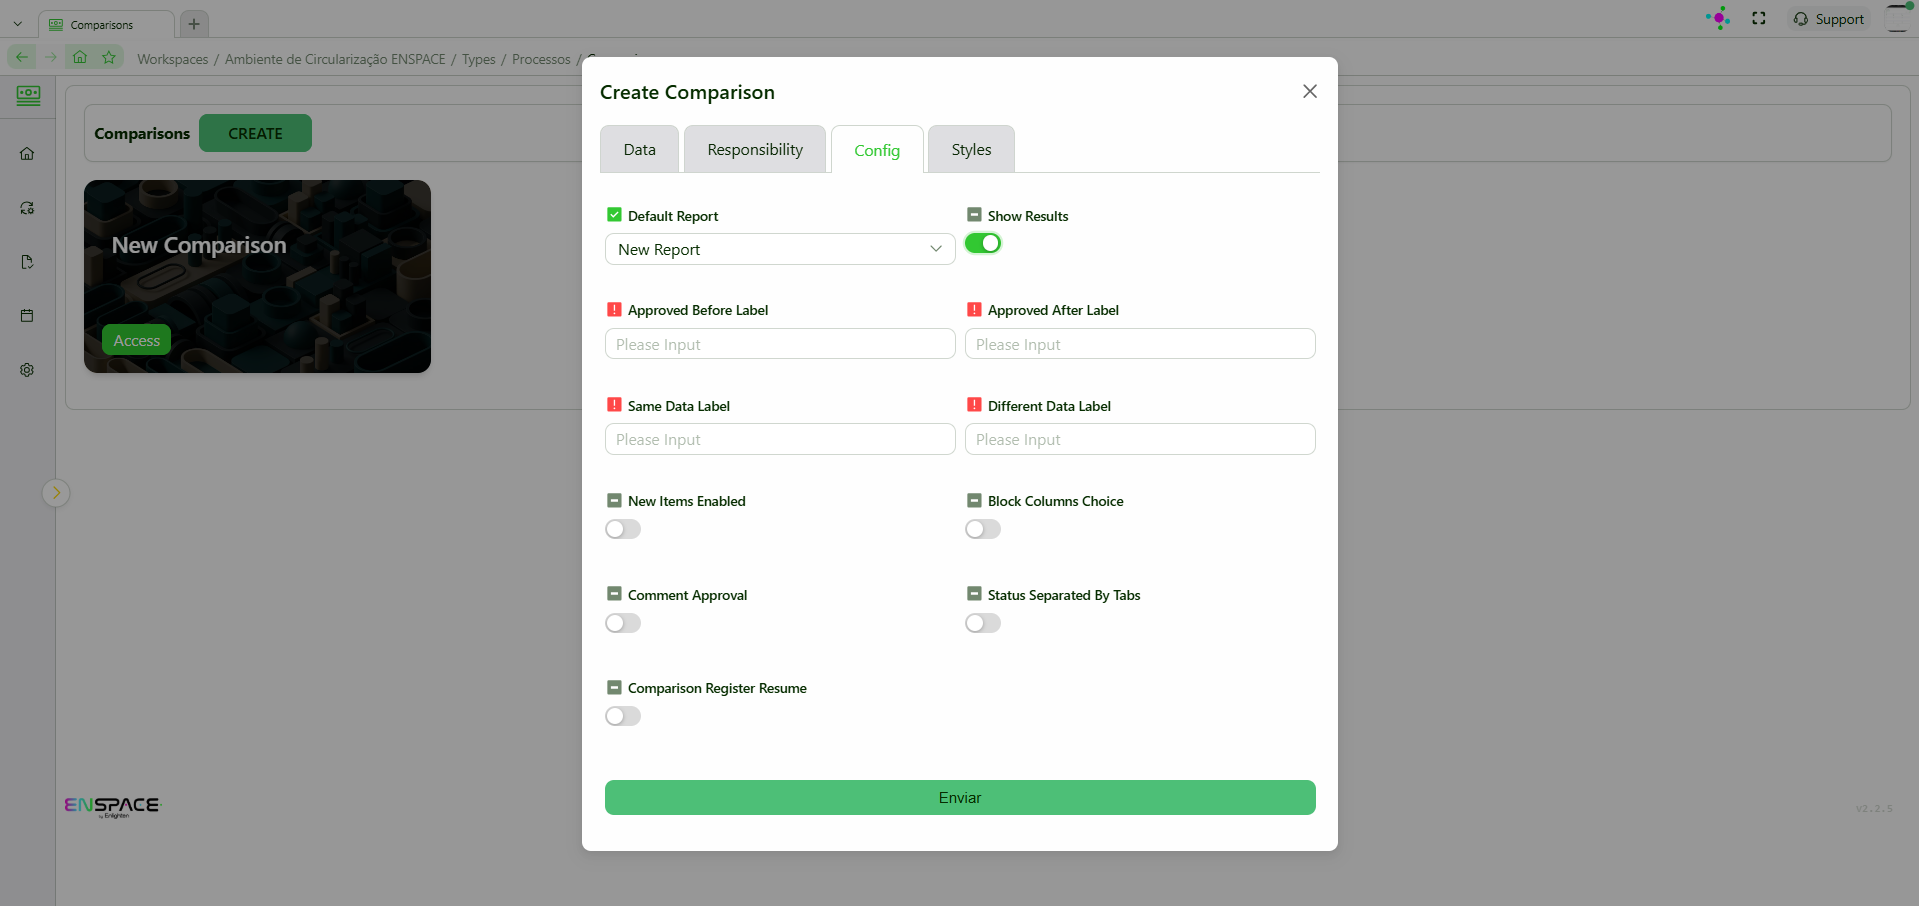
- Enable New Items: allows the responsible user to create new items during comparison (requires approval).
- Lock Column Selection: prevents responsible users from changing column order during comparison.
- Comment on Approval: by default, justification is required only for rejection. This makes justification also required for approval.
- Status Tabs: create separate tabs for each item status:
Pending Status Tab
Approval Status Tab
New Records Status Tab
Complete Status Tab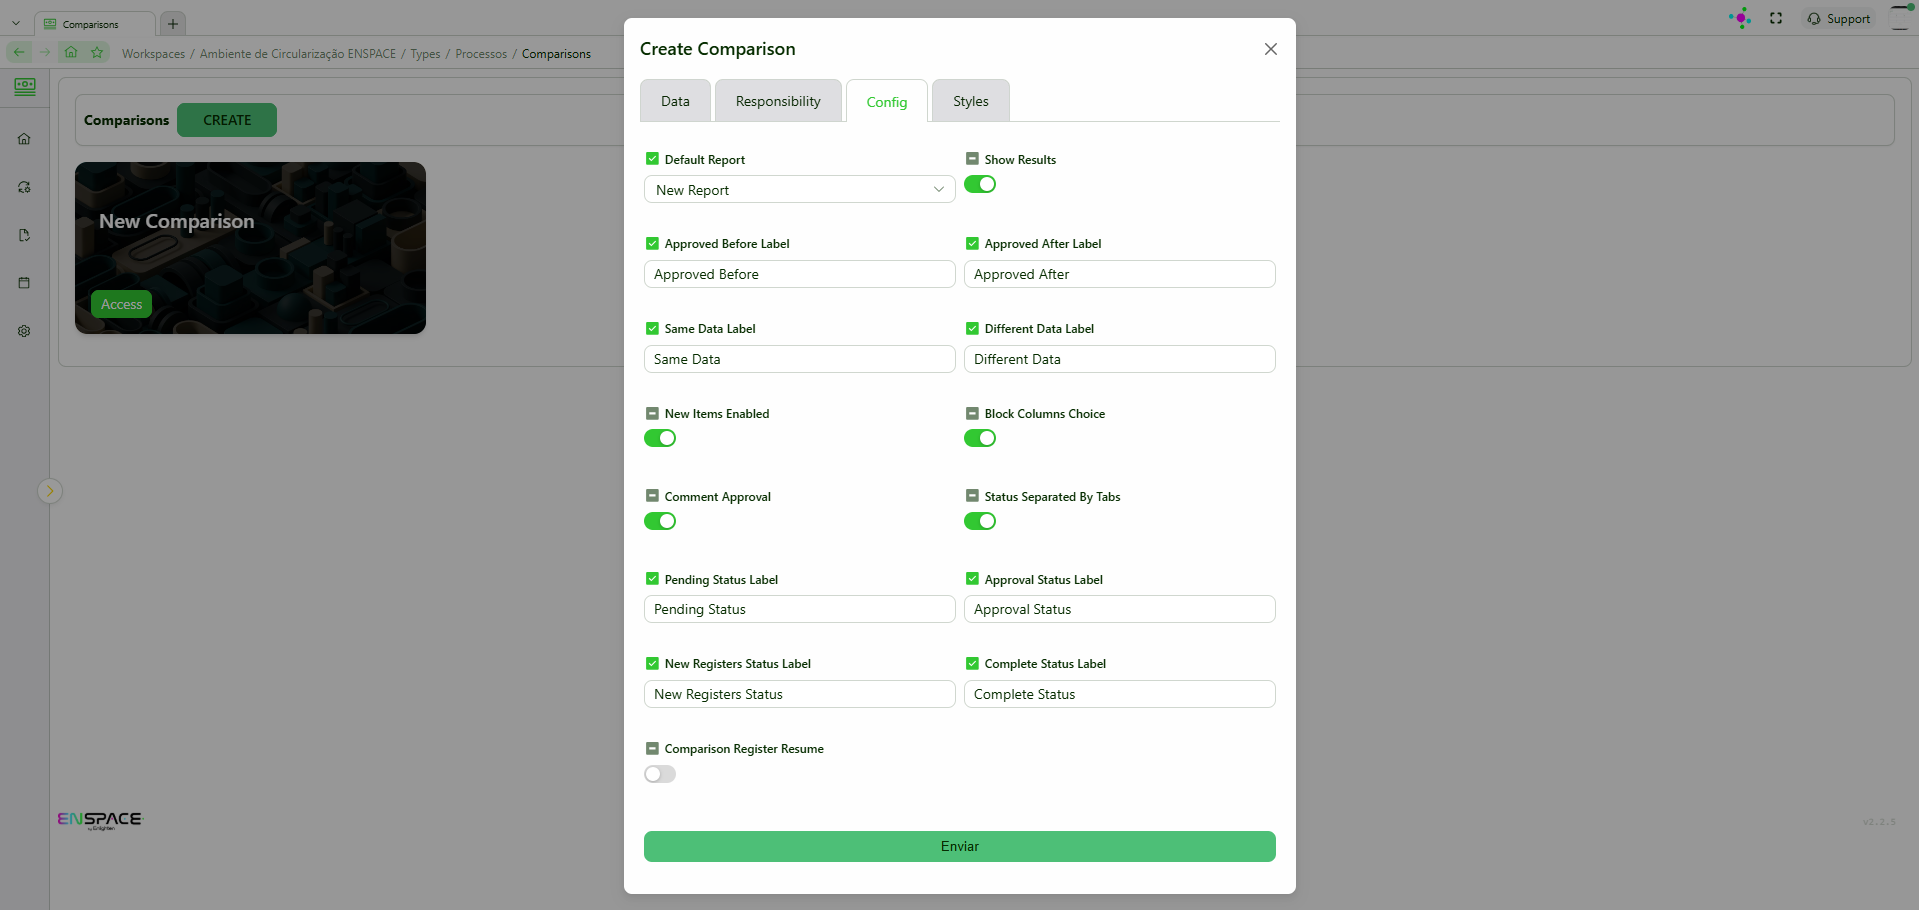
- In the "Customization" tab, define: Header Color, Header Font Color, Inner Header Color, Outer Header Color, Final Header Color, Result Header Color, Inner Cell Font Color, Outer Cell Font Color, and Border.
- USING
Your comparison is now functional and ready to use. Here are some guidelines:
- When accessing the comparison, a responsible user only sees processes assigned to them, while the approver sees all processes.
Responsible view: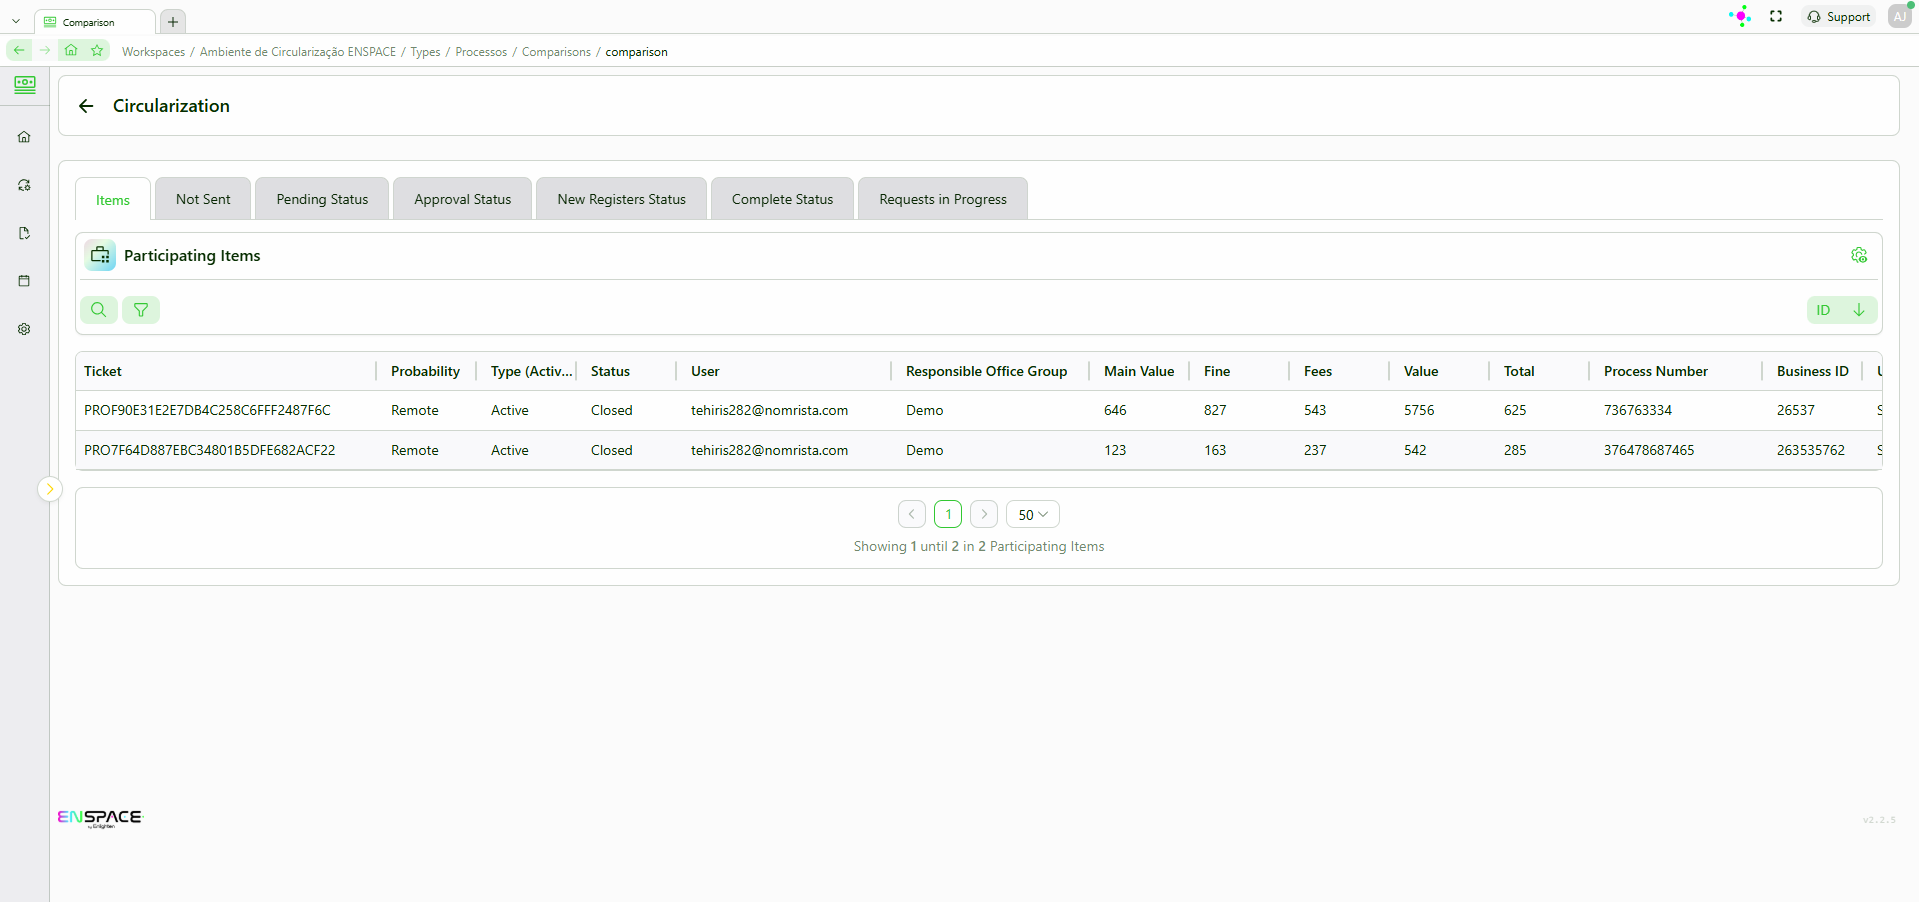
Approver view: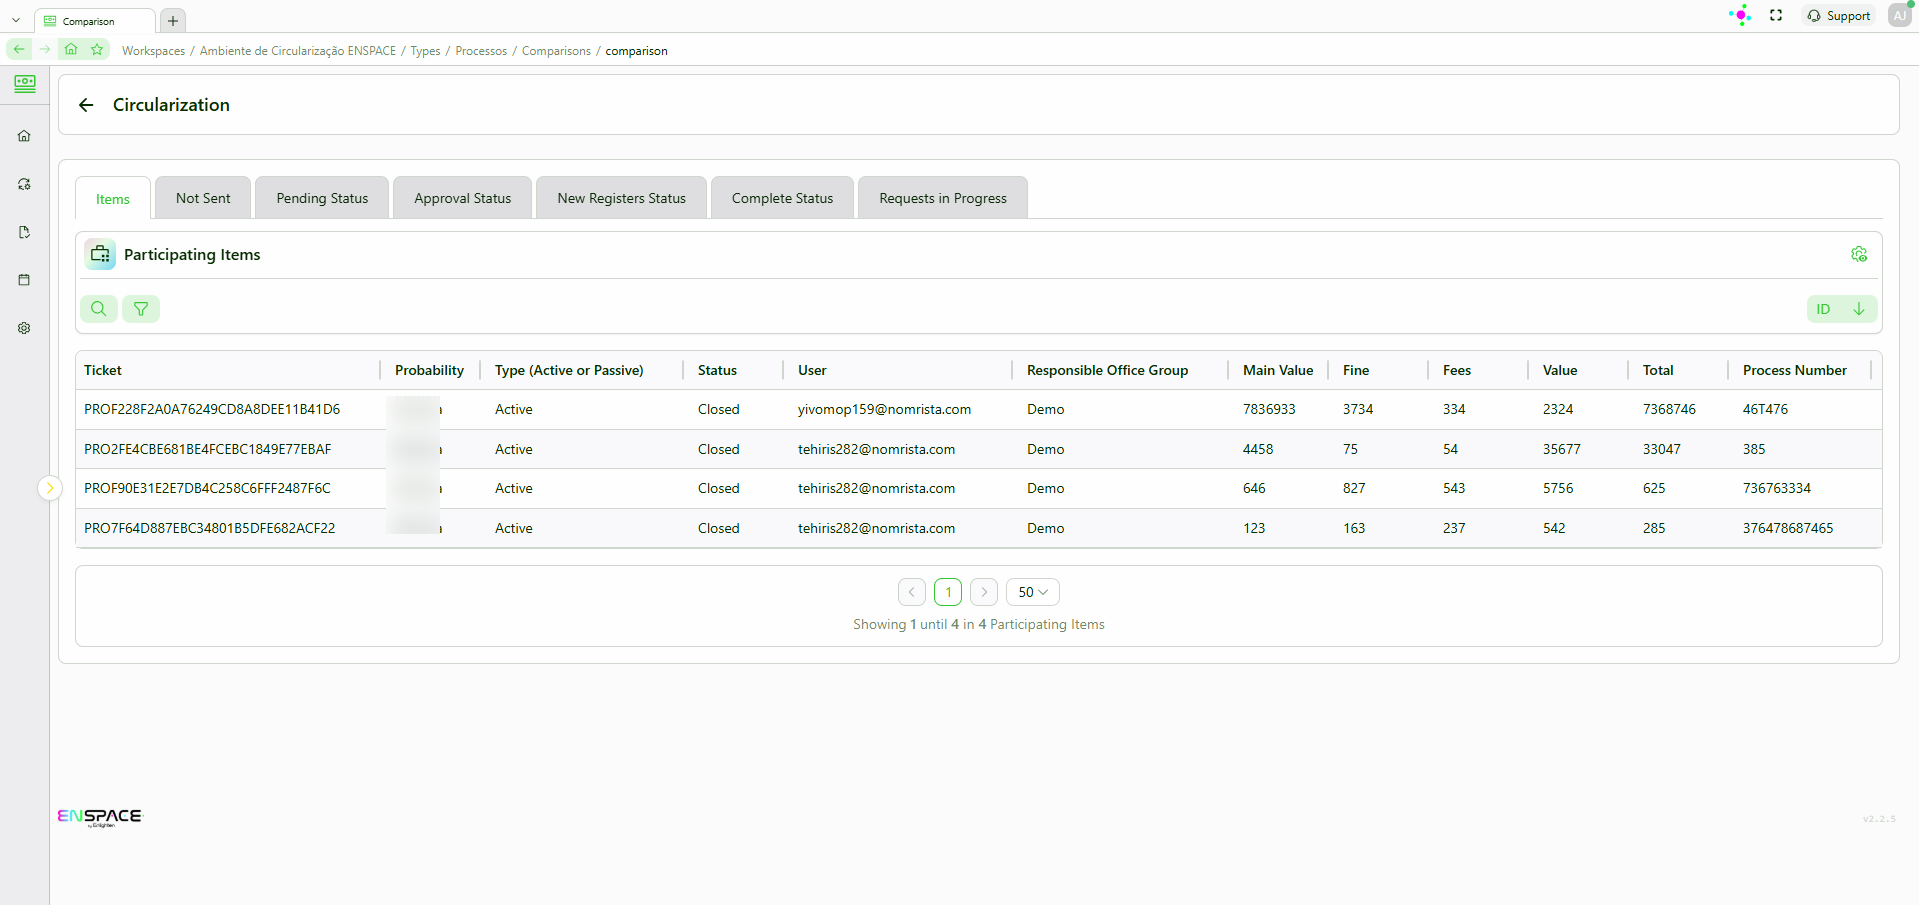
- The "Not Sent" tab shows all items pending submission by the responsible user. Again, each sees only what’s relevant.
Responsible view: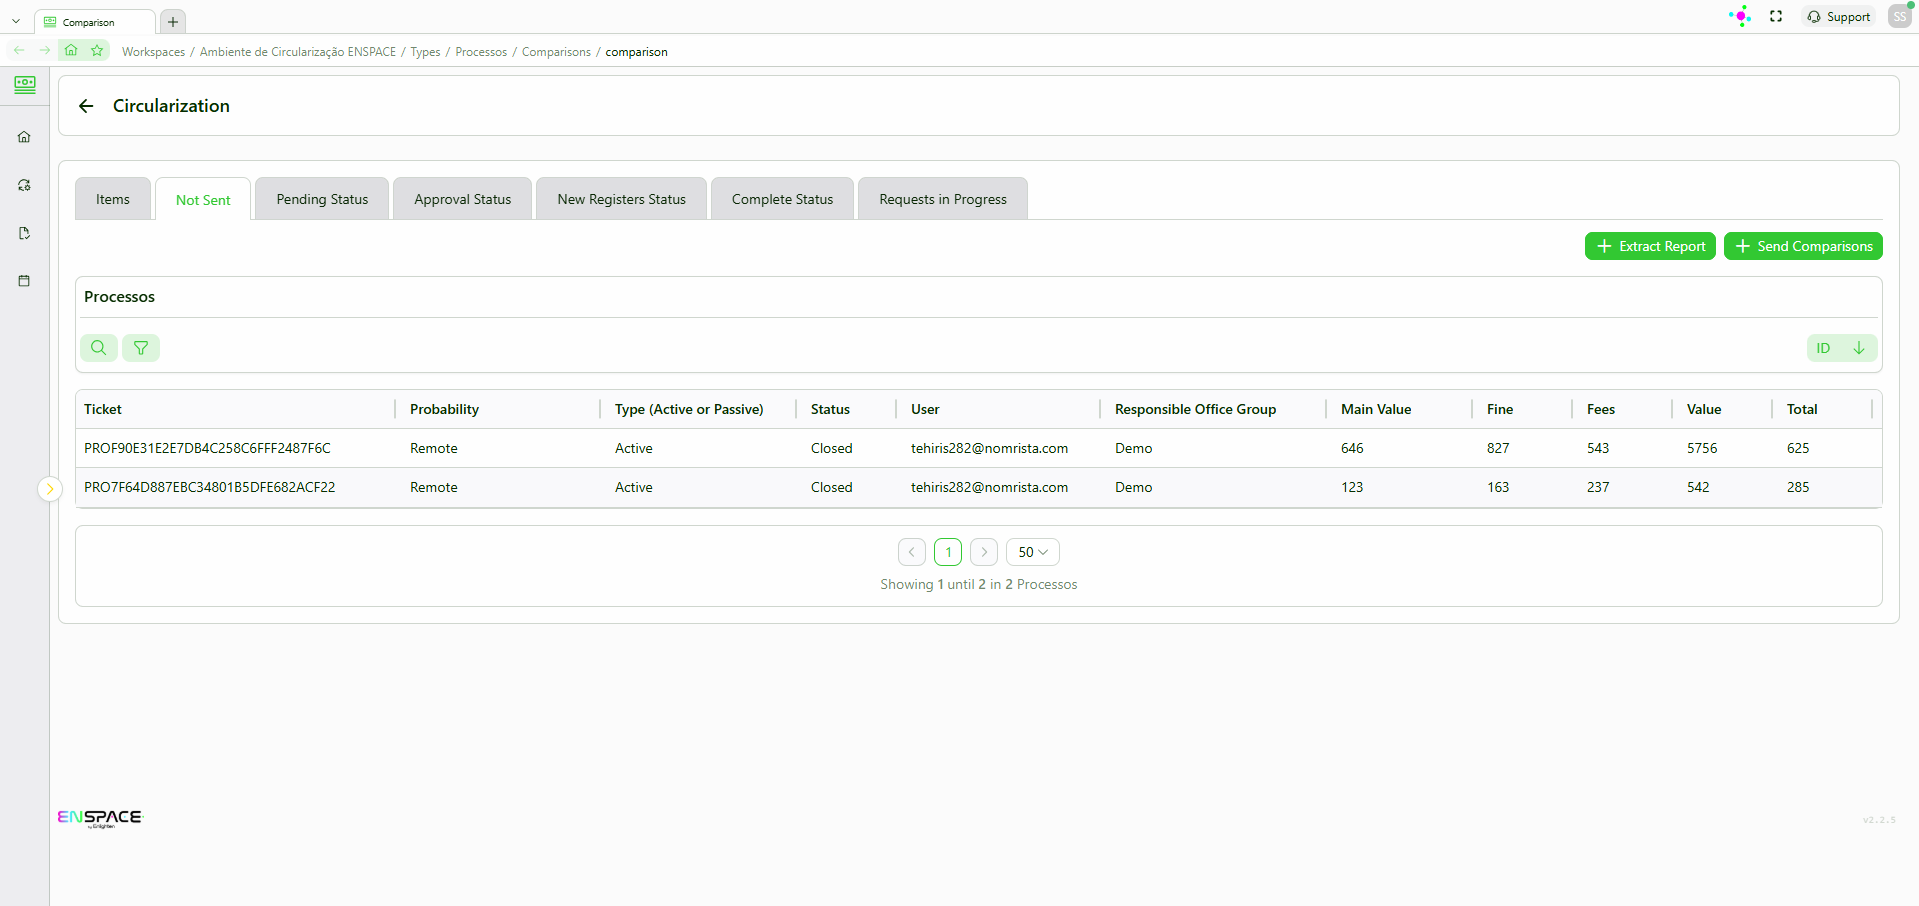
Approver view: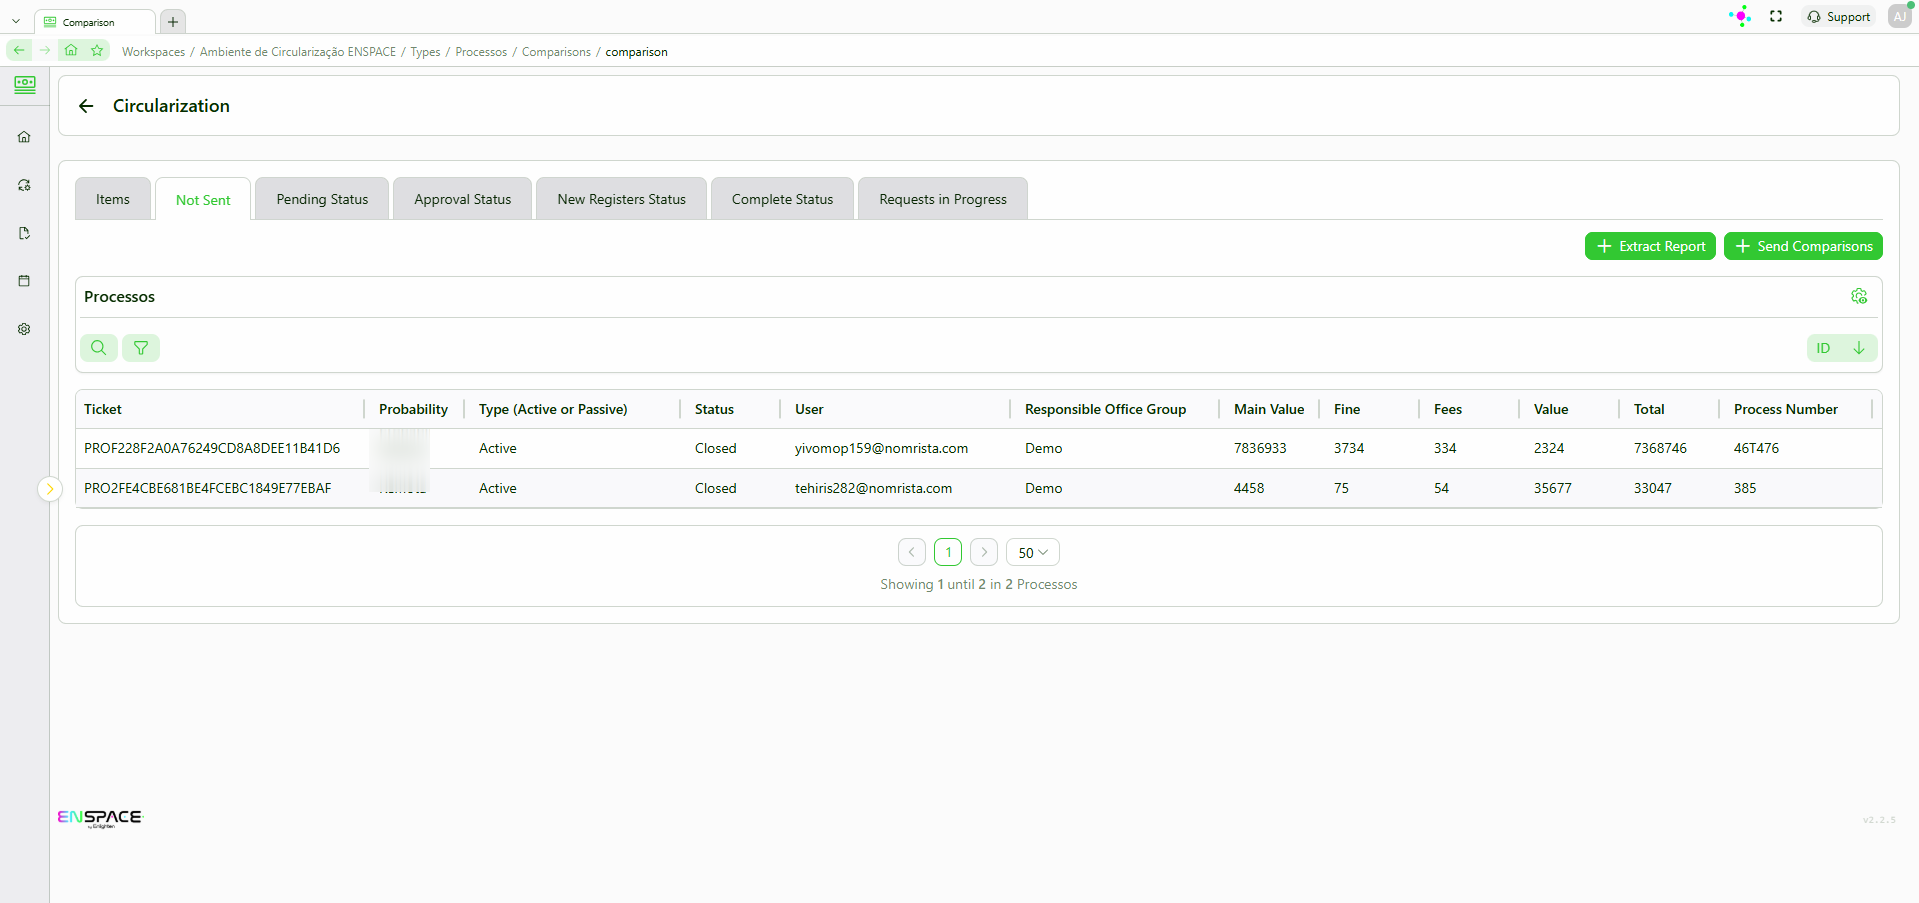
Note:
Here the responsible user must click "Extract Report", make necessary changes in the file, and then click "Send Comparisons".- Non-circularizable fields will be ignored even if altered.
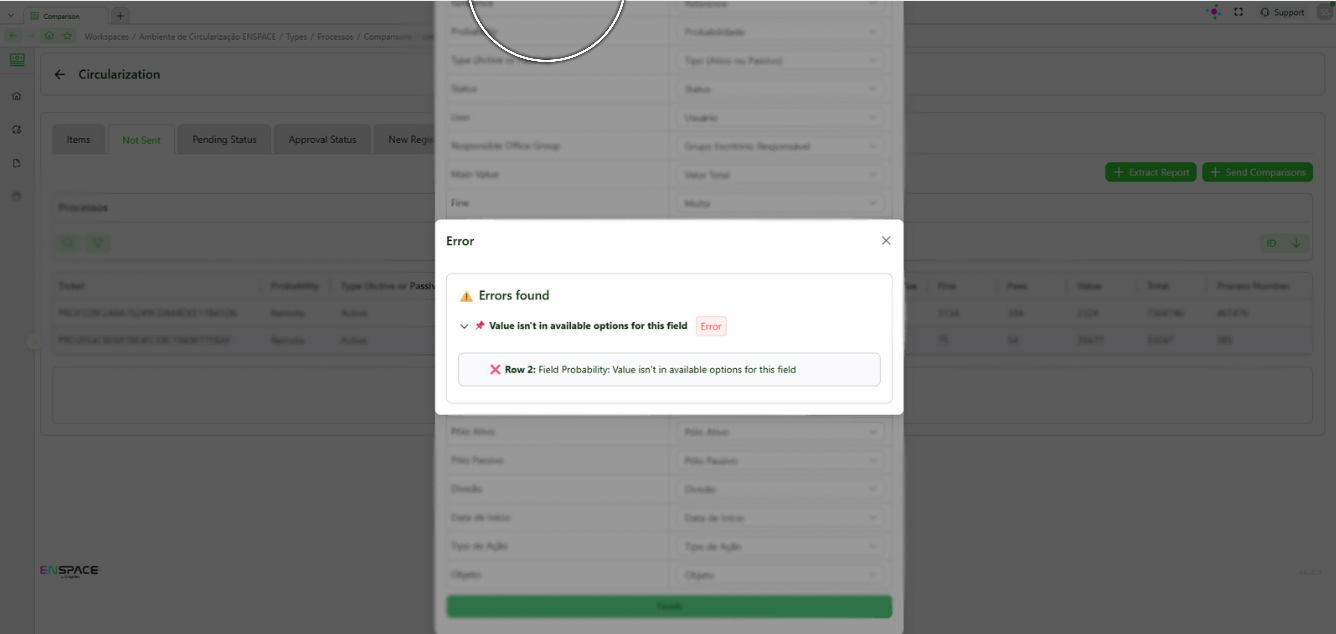
- Invalid values will be flagged during submission.
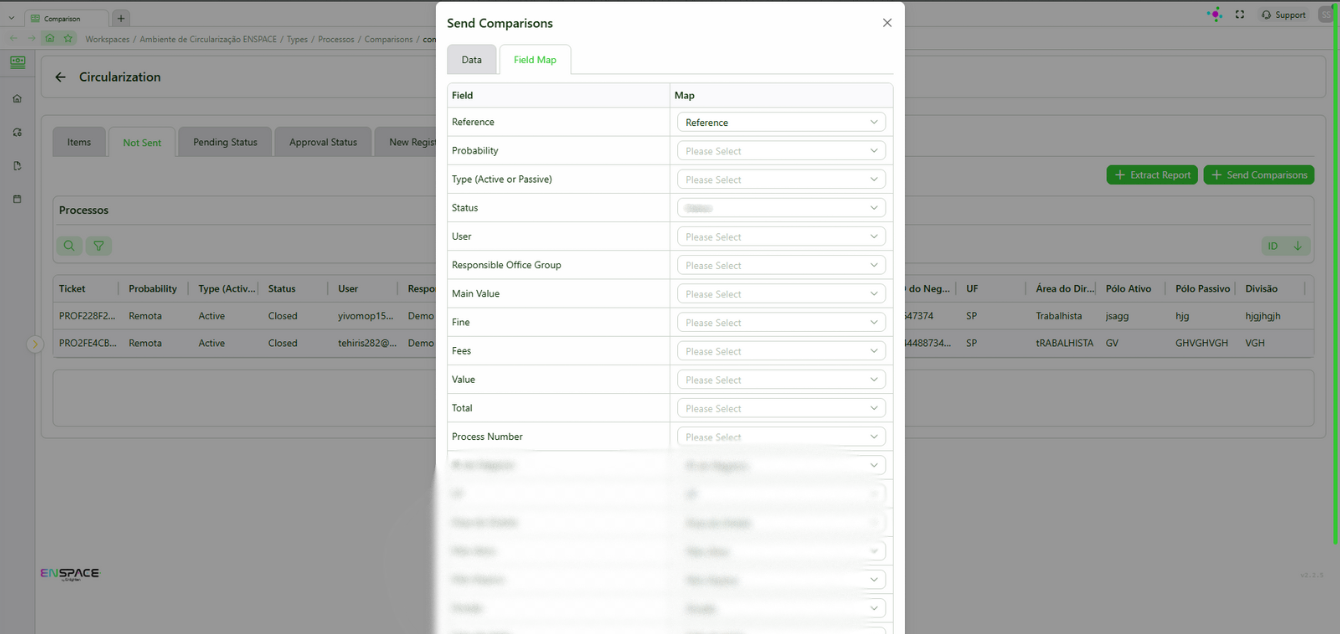
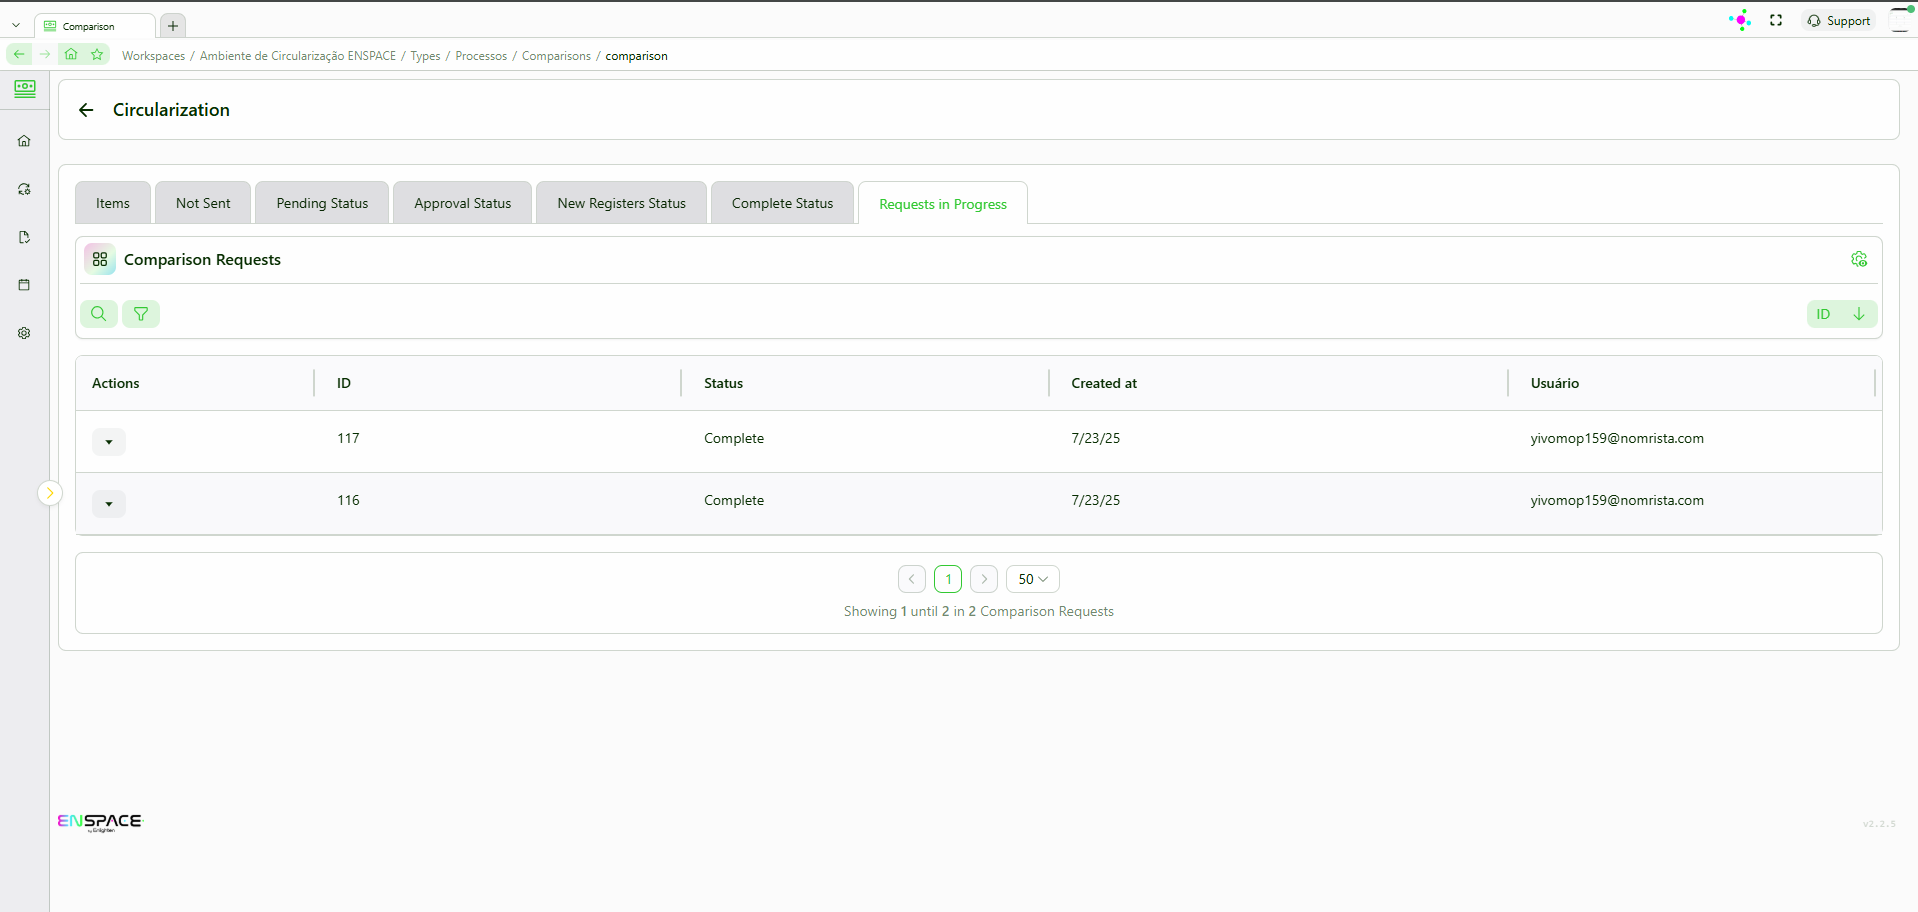
- Track your submissions under "Ongoing Requests":
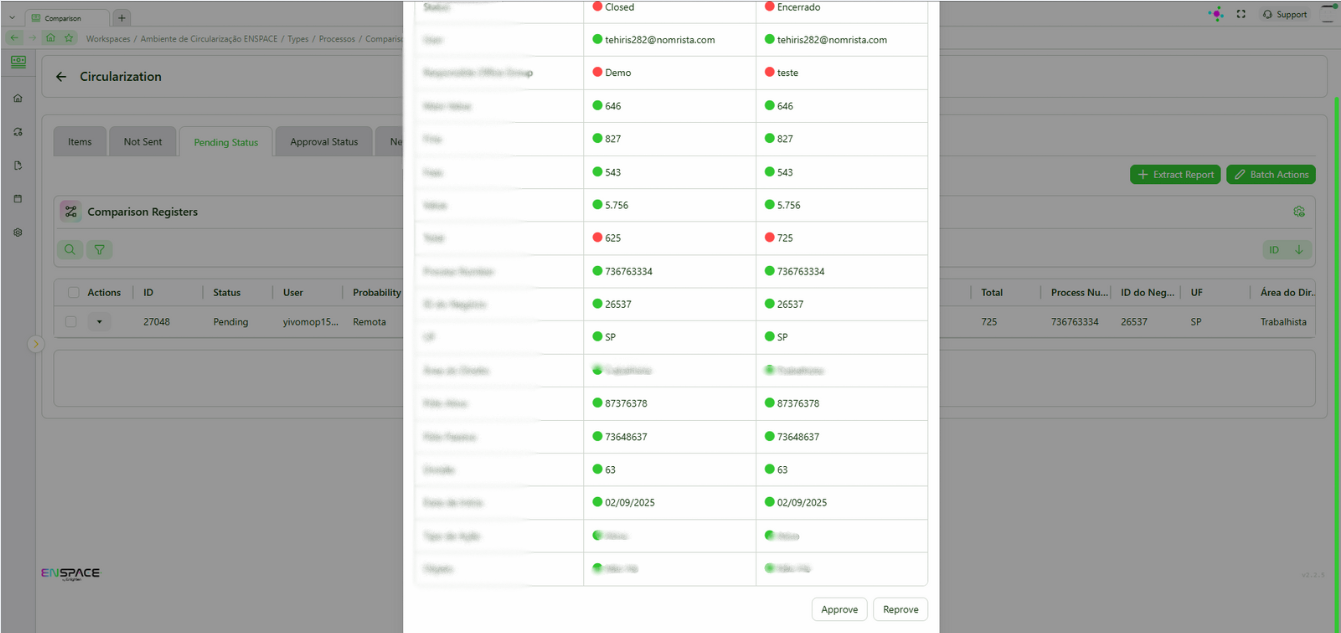
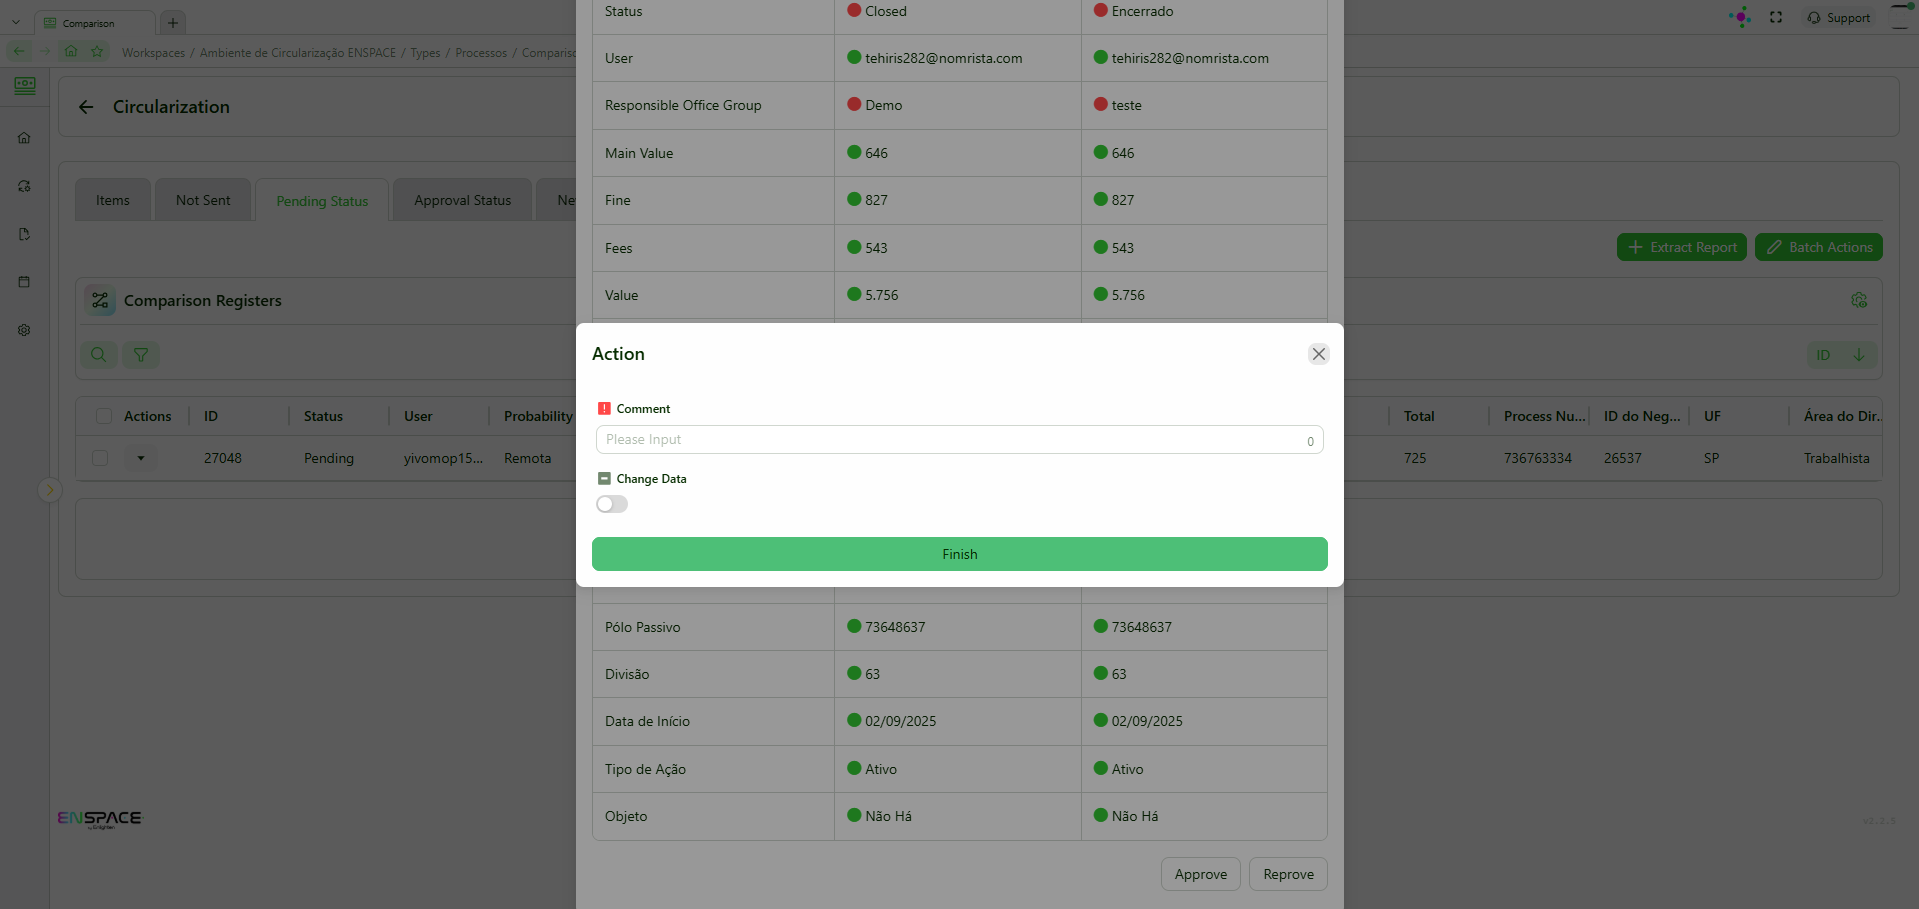
- In the "Pending" and "Approval" tabs, view, approve, or reject comparisons:
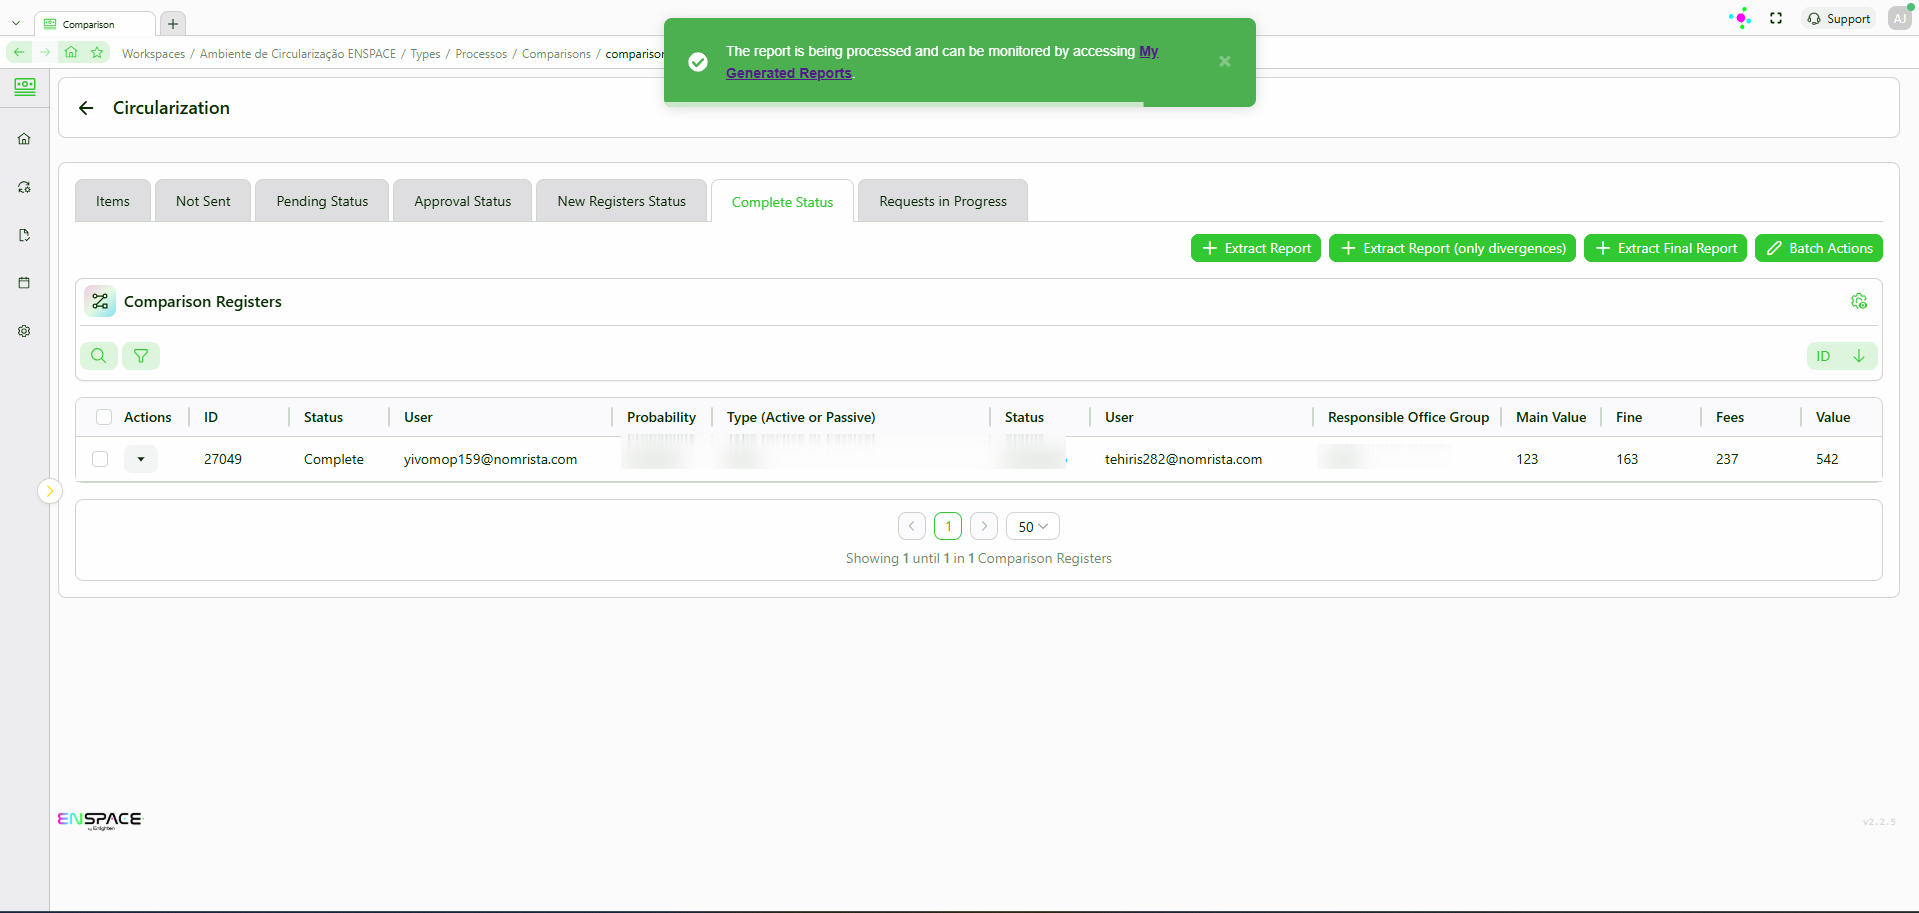
- In the "Complete" tab, export reports as needed — either a full report or one with only the changes made: